How do I set up a FTP integration?
Last updated: October 17, 2025
Set up FTP Integration
This is a comprehensive guide to setting up a FTP integration within Ambition. We advise working through the entire document if this is the first FTP Integration that your organization has setup within Ambition. Below are quick links to specific aspects of setting up a FTP integration.
Enable a FTP Integration
Users with the "Integrations: Edit" permission will be able to access the Integrations tab and create, edit, and delete all metrics.
1. Login to your Ambition instance.
2. Open the left navigation and click Administration > Data > Integrations.
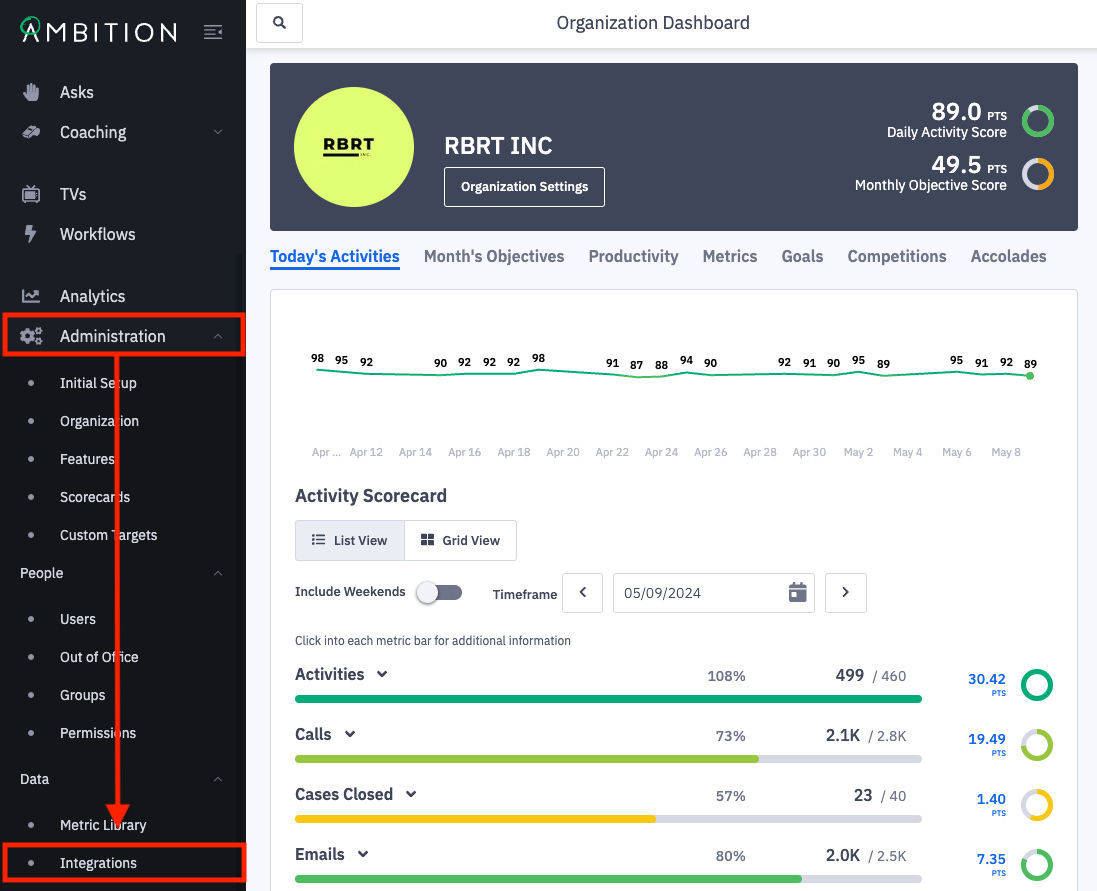
3. Click the + Enable Integration button.
If this is the first integration enabled in your instance, you will skip this step and begin at step 4.

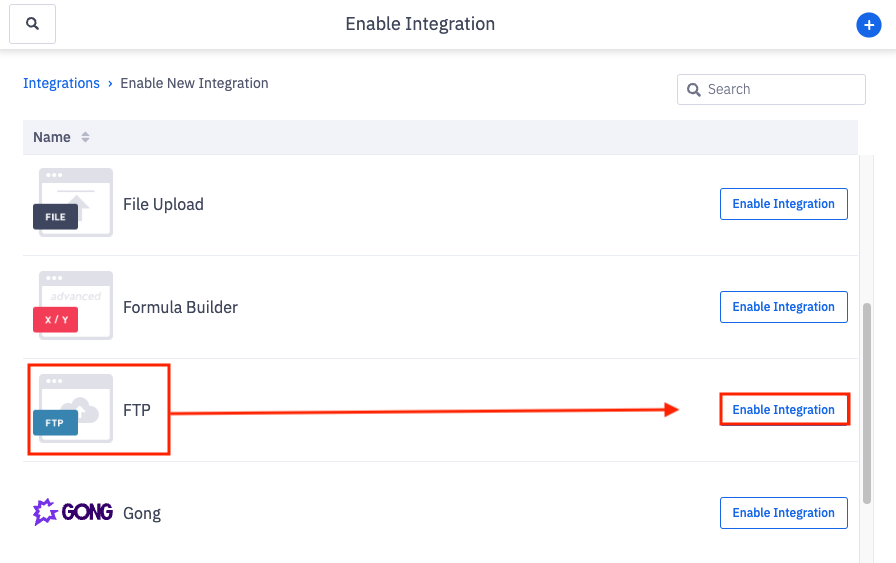
4. Locate the FTP integration and click "Enable Integration" in line with the FTP integration name and icon.
You will be redirected into the newly enabled FTP Integration.
Upon enabling you will be redirected within the integration. To enter the FTP integration anytime after original enabling:
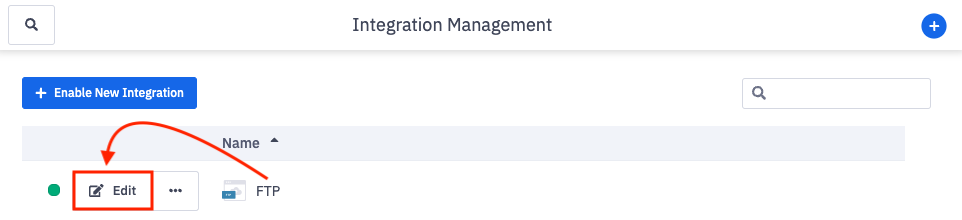
Once enabled, the FTP integration will appear on the Integration Management page.
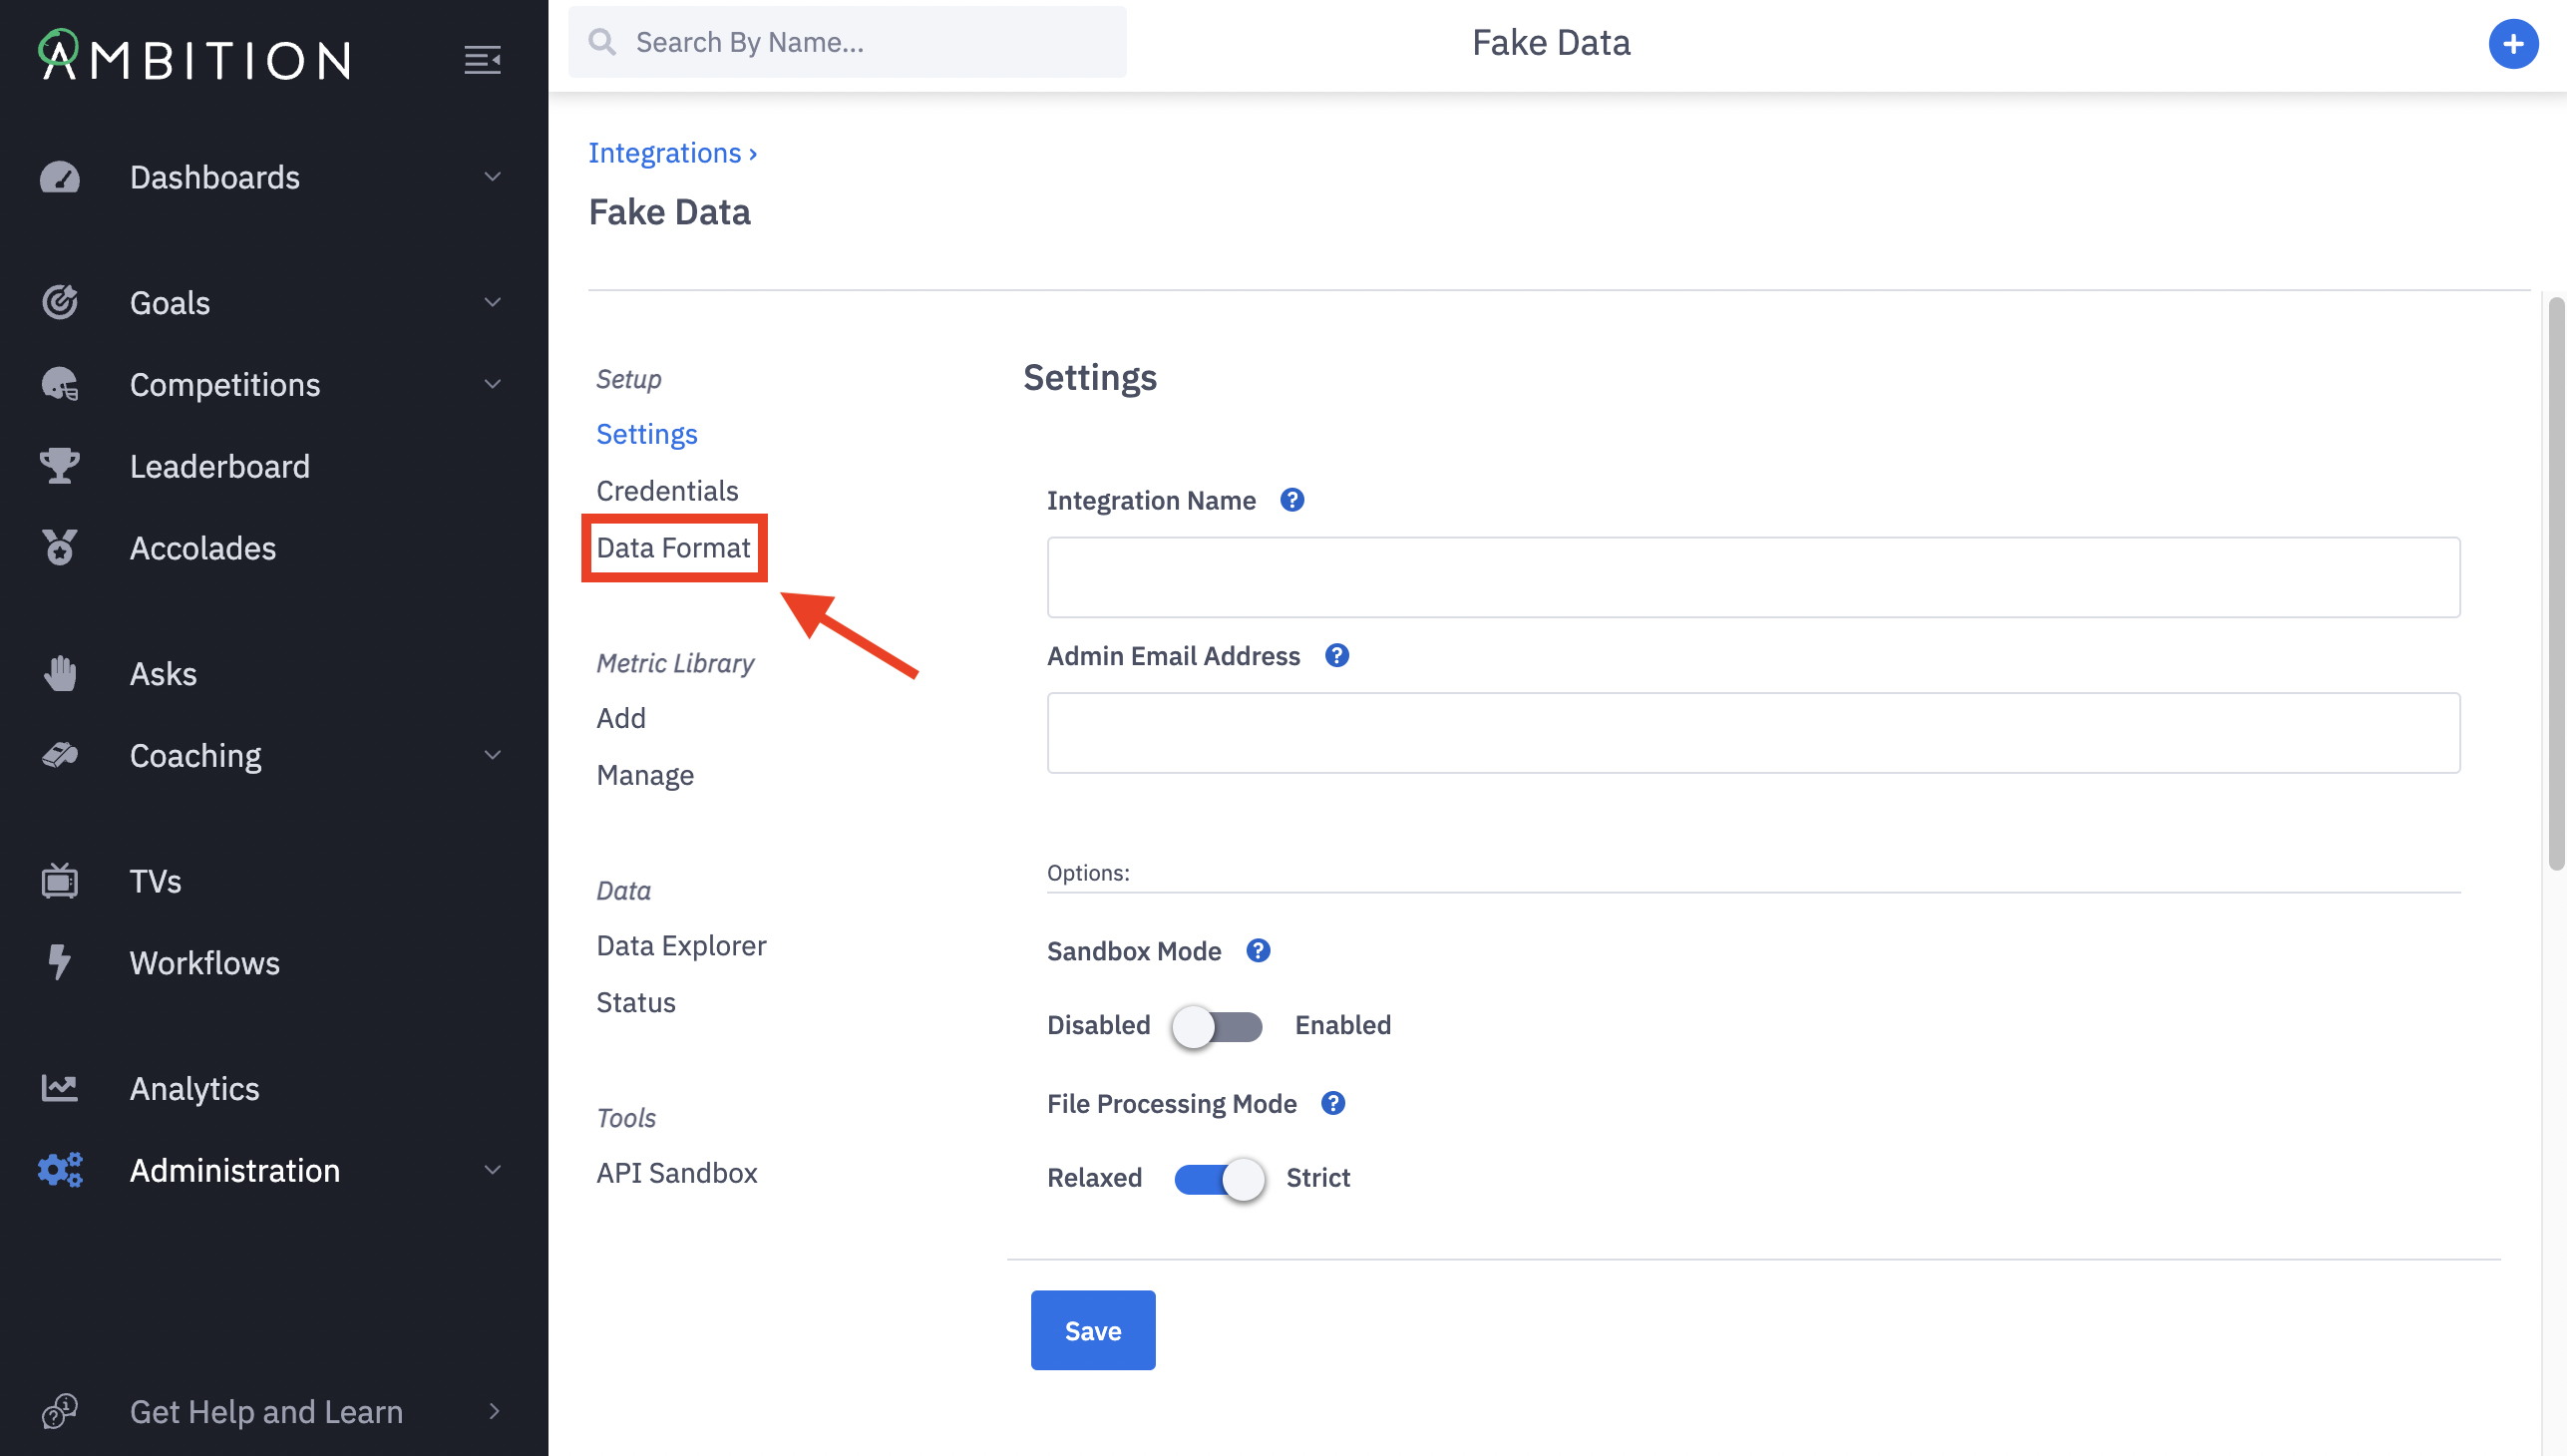
5. Click Edit in line with the appropriate FTP integration.
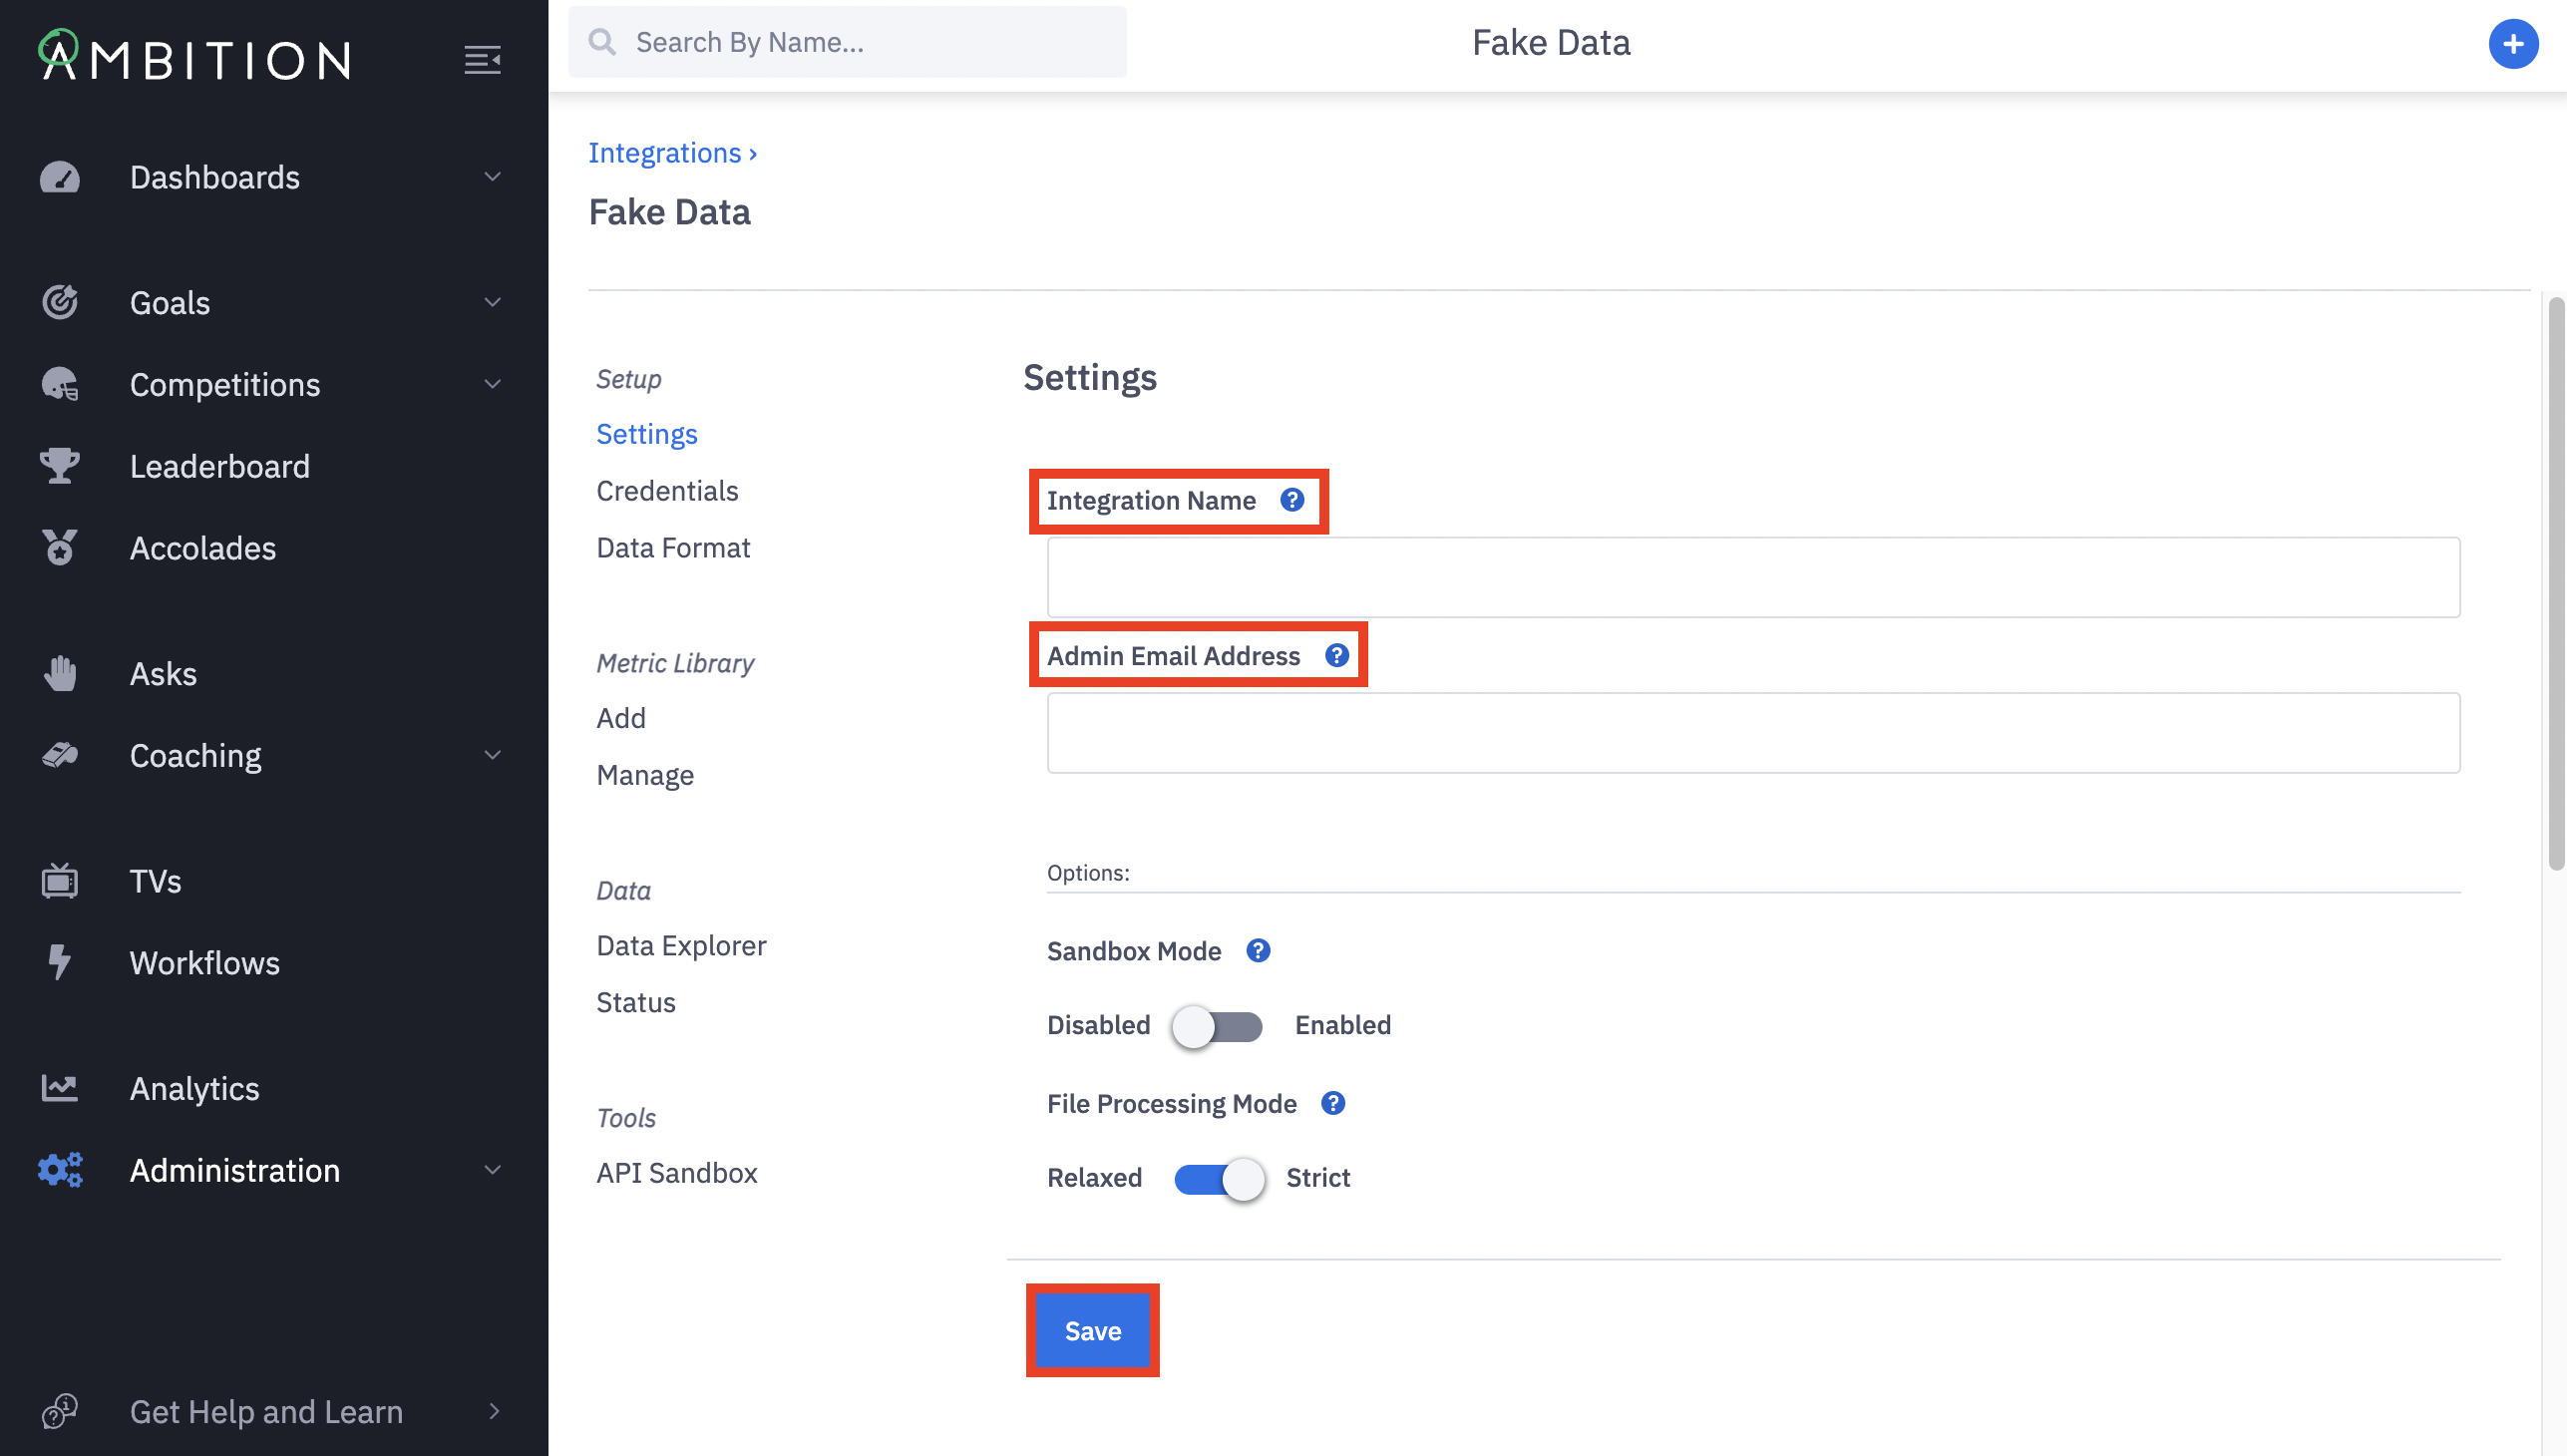
6. Set a descriptive name for Integration Name. We recommend an explicit name, typically the system/data being transmitted.
7. Provide an Admin Email Address. This email will be contacted if an integration issue arises.
8. Click the Save button.
Remember that you will need to enable a distinct FTP integration for each system and/or dataset you wish to transmit.
Set the Data Format
You've now enabled the FTP Integration, but Ambition needs to be instructed on how to handle your data.
Here you will indicate what type of file format will be sent to Ambition, CSV or JSON, and map the file's fields to Ambition field types.
1. Within the FTP integration, click on Data Format.
2. Locate the Data Format options. Set to either CSV or JSON.
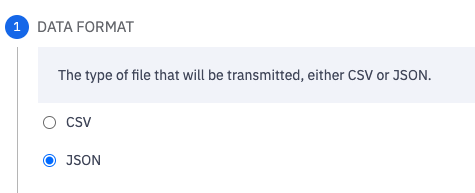
If JSON was selected as the data format and you are sending nested JSON data, the JSON Transformer section will be used to flatten and parse any nested data.
Learn more here.
Set the Data Format
You've chosen what type of file will be sent, now you will determine how your data is formatted.
Will your organization be sending Daily Totals or Records?
Data Schema Type
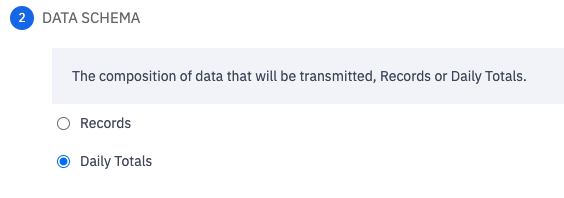
3. Locate the Data Schema options. Step 3 for JSON files, Step 2 for CSV files.
Select either Daily Totals or Records.
Daily Totals
Select Daily Totals if you will be transmitting daily metric totals for each employee. Using Daily Totals format means that you (or your system) already processes the data and you will be sending Ambition the pre-calculated daily results.
Daily Total Example - CSV
email,date,calls,emails,appointments
jason@yourcompany.com,2020-8-17,11,12,3
sarah@yourcompany.com,2020-8-17,6,9,10
Ambition can only process metric totals keyed to a specific date. You can not send aggregated weekly or monthly totals. If you have a need to send aggregated totals, learn more about the Most Recent Value Metric type here.
Records
Select Records if you will be transmitting raw records for each employee. Using Records format means that you will be offloading the processing to Ambition, specifically the logic to derive metrics from records.
Records Example - CSV
email,created_date,record_id,type,status,appointment_date,booking_date,revenue
jason@yourcompany.com,2020-8-14 8:23:11,abc123,appointment,completed,2020-8-17 11:30:00,,
jason@yourcompany.com,2020-8-17 7:59:23,abc456,call,completed,,,
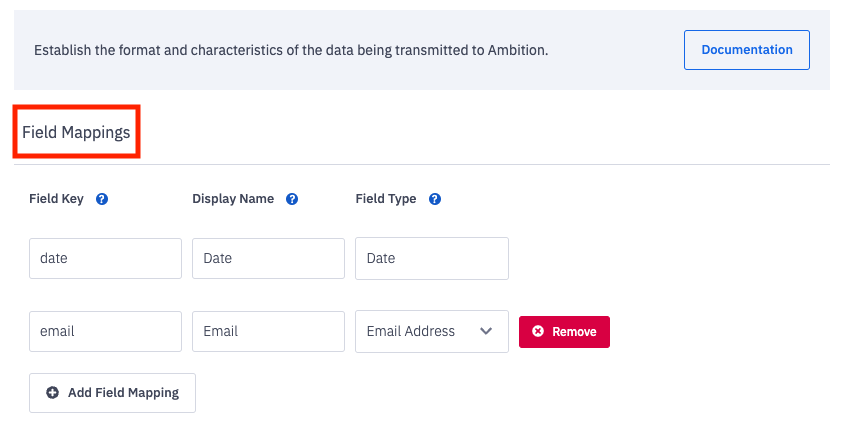
Field Mappings
The Field Mappings section is where you will define and map the data transmitted.
If your File Format is CSV, then you will be mapping your spreadsheet's named columns.
If your File Format is JSON, then you will be mapping your key names.
If you select Daily Totals, a date and email Field Key will populate in your Data Format.
If you select Records, an id, email, and date Field Key will populate in your Data Format.
Ensure that these Field Keys are updated to match the formatting of your actual headers or keys.
Filed Mappings | Field Mapping Descriptions |
Field Key | How the field is identified within your file, either a key or column header. 43 character limit. |
Display Name | How the field key will be displayed within Ambition. |
Field Type | The type of information contained within the field. |
Field Type Options
Your Data Format Type (Daily Totals or Records) will determine which Field Types are available.
Field Types | Field Type Descriptions |
Unique Record Identifier | Specific to the Records format type, you must transmit and map a field specifying record-level uniqueness. Ex: record_id, order_number |
Unique Employee Identifier | Field specifying the employee who should be credited for the data. This is commonly an employee_id. Unique Employee Identifier or Email Address is required. (Upon saving the Data Format, the correlating Field Type will be renamed from Unique Employee Identifier to an integration specific name for easier identification across platform) Ex: employee_id, employee_extension |
Email Address | Email address of the employee who should be credited for the data. A single Field Key can be mapped to Email Address per data format. Email Address or Unique Employee Identifier is required. |
Date/Time | Specific to the Records format type, you must transmit and map a field specifying the record's timestamp in your local timezone. Standard YYYY-MM-DD hh:mm:ss Format Note: If you would like to send Date/Times in UTC, please contact gethelp@ambition.com to aid in the integration setup. |
Date | You must transmit and map a field specifying the record's date. We will automatically floor timestamps. A single Field Key can be mapped to Date for Daily Totals integrations. Standard YYYY-MM-DD Format |
Number | Field containing a number to be used in creating and processing metrics. Duration metrics need to receive values formatted in seconds. Ex: amount, duration |
Dimension | Specific to the Records format type, a field containing a string to be used in creating and processing metrics. Ex: type, stage, status |
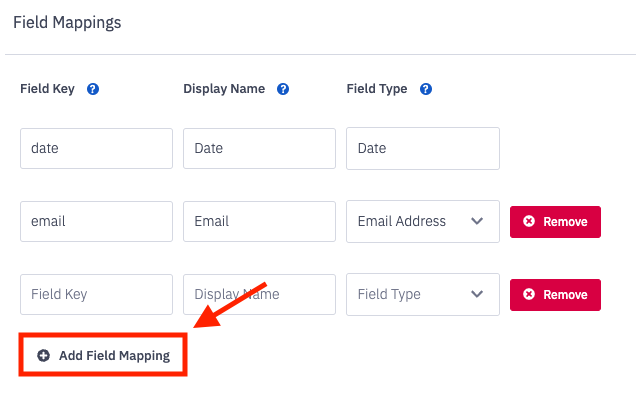
Create Field Mappings
1. Click the Add Field Mapping button.
2. Fill in the Field Key, Display Name, and Field Type for each CSV column header or JSON key.
Field Key: How the field is identified within your file, either a key or column header.
Display Name: How the field key will be displayed within Ambition.
Field Type: The type of information contained within the field.
As noted above:
Ensure that these Field Keys are updated to match the formatting, including capitalization, of your actual headers or keys.
Update the date and email, and if Records based data, id placeholder Field Keys as needed to fit your Data Format.
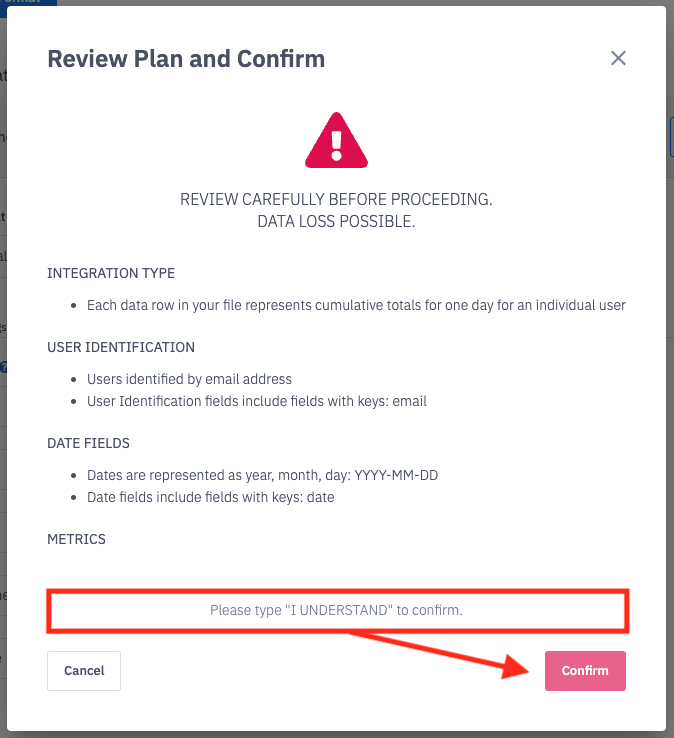
4. Once all mappings are complete, click the Save Data Format button.

5. Type I UNDERSTAND and click the Confirm button to confirm your understanding about the data format type, fields, and metrics put in place.
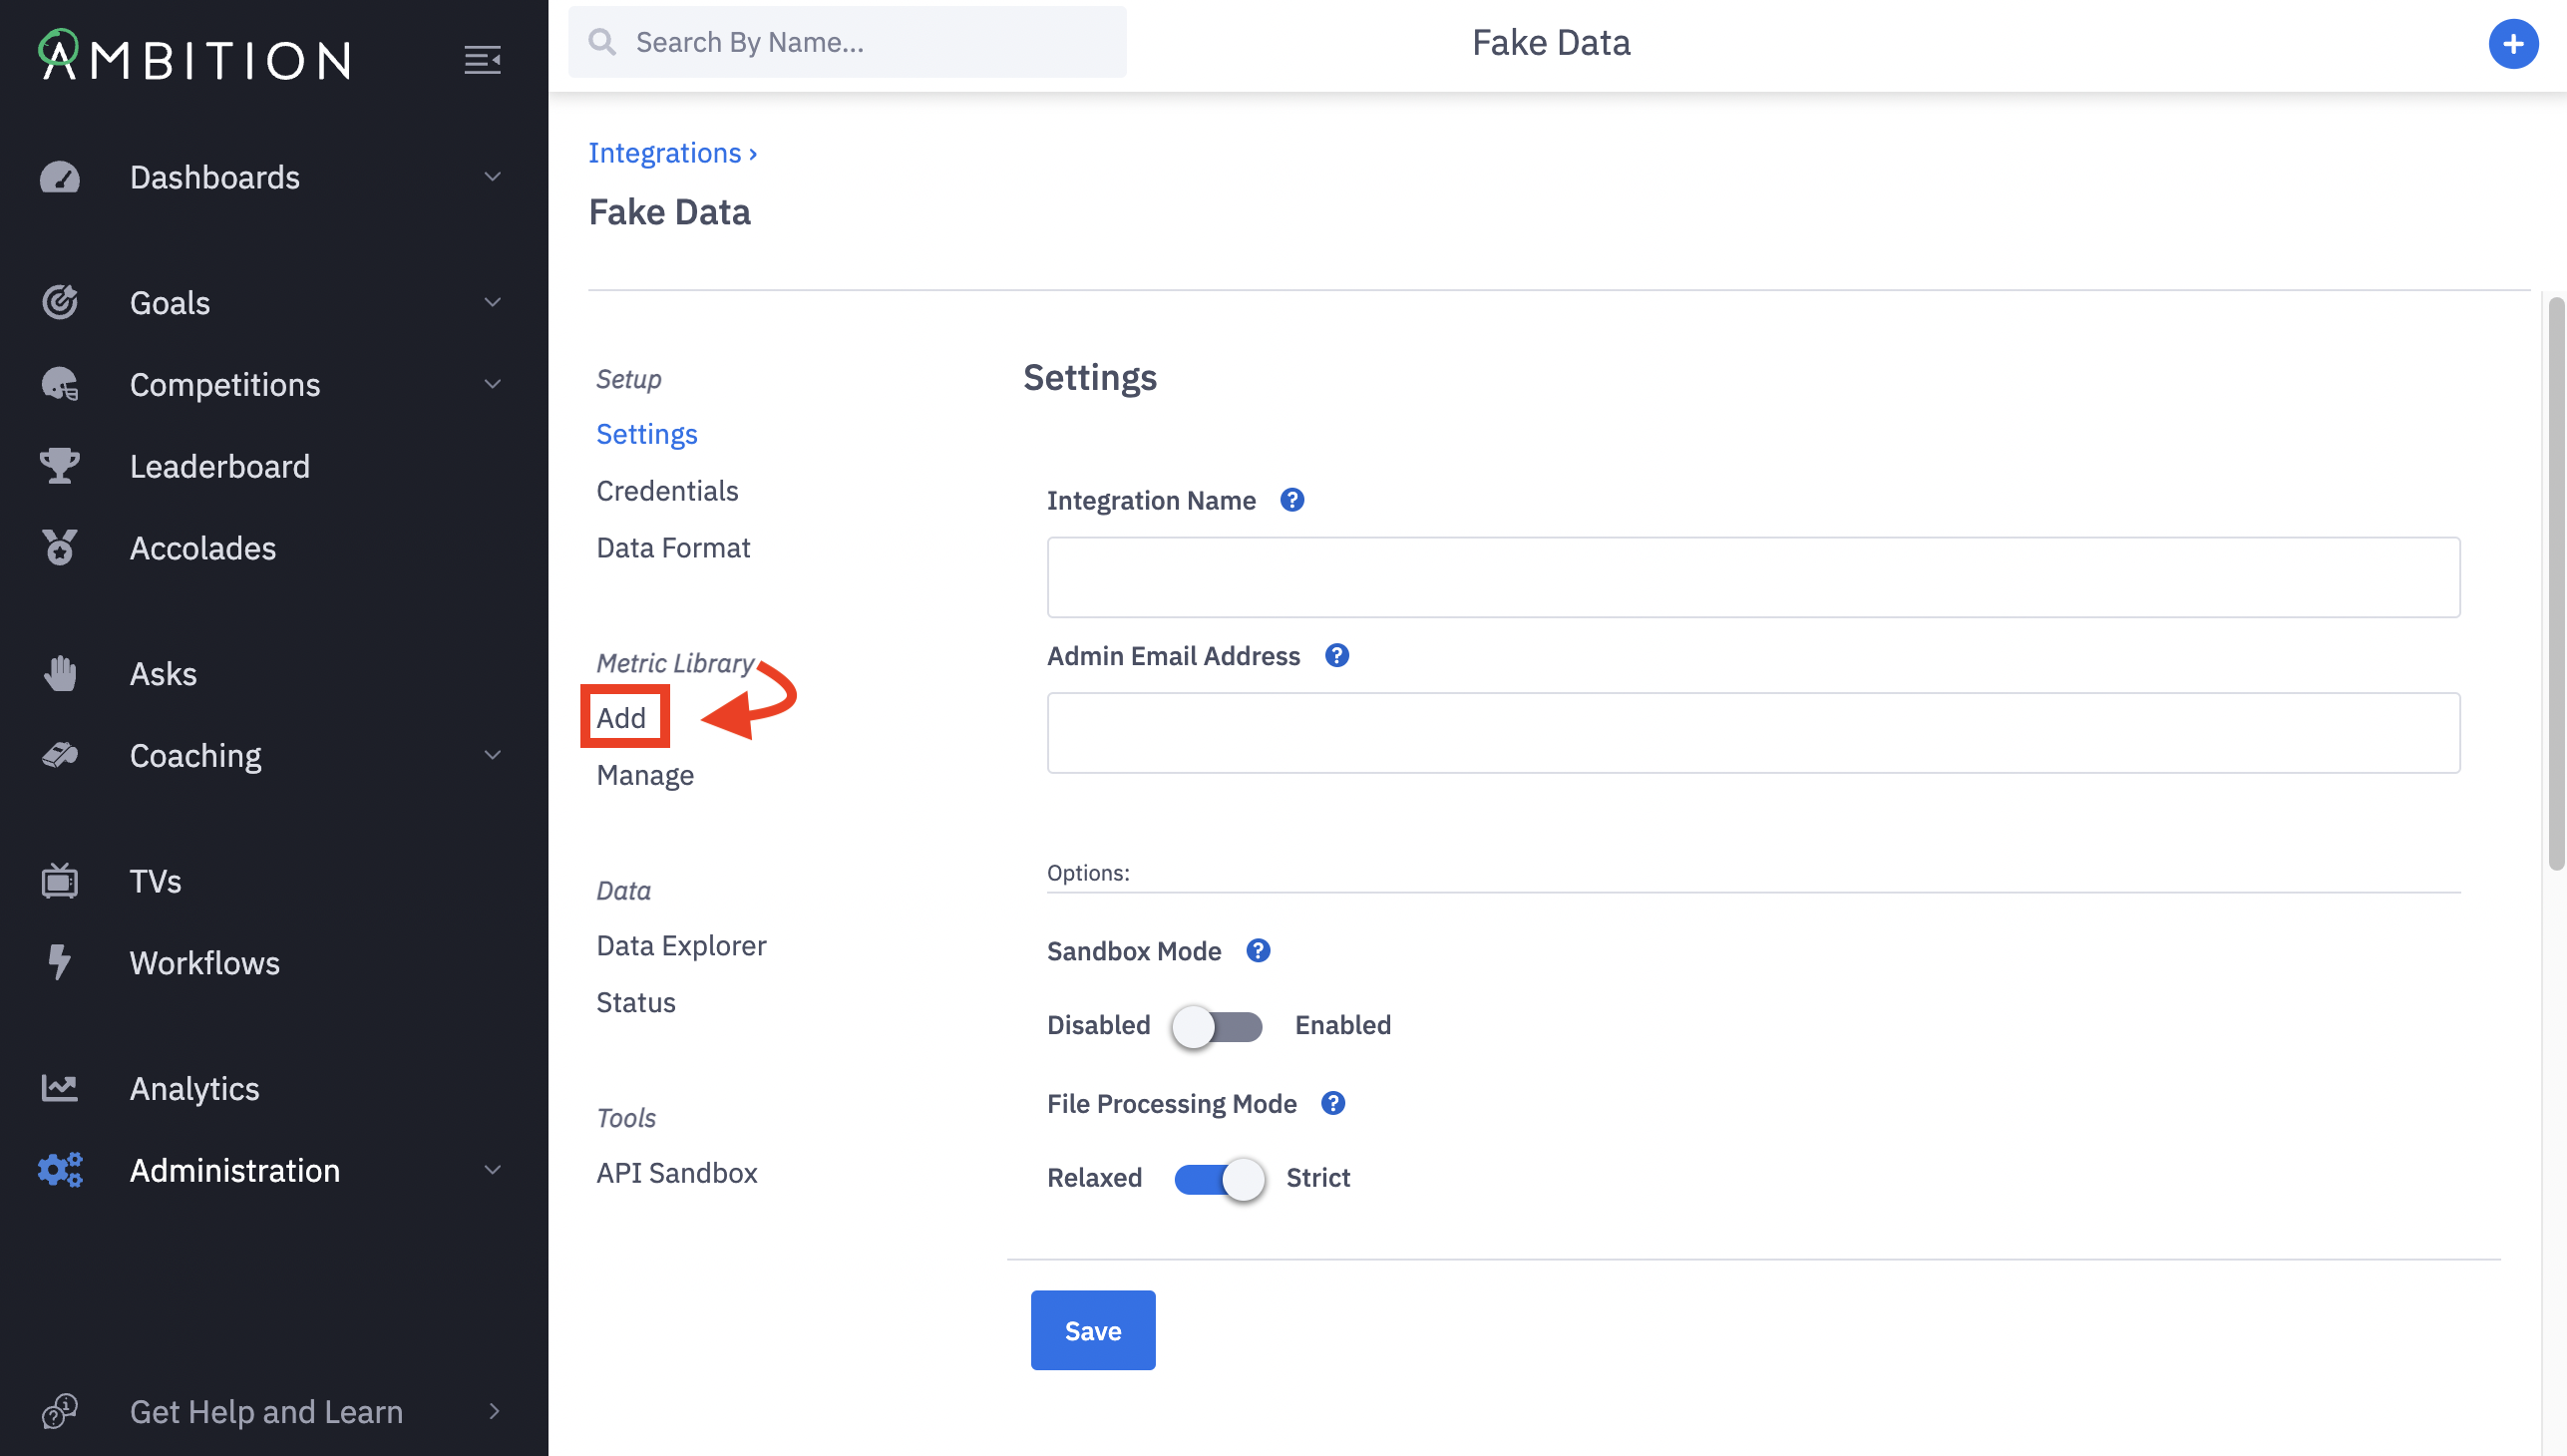
Metrics
If accessing existing metrics, click Manage under the Metric Library tab.
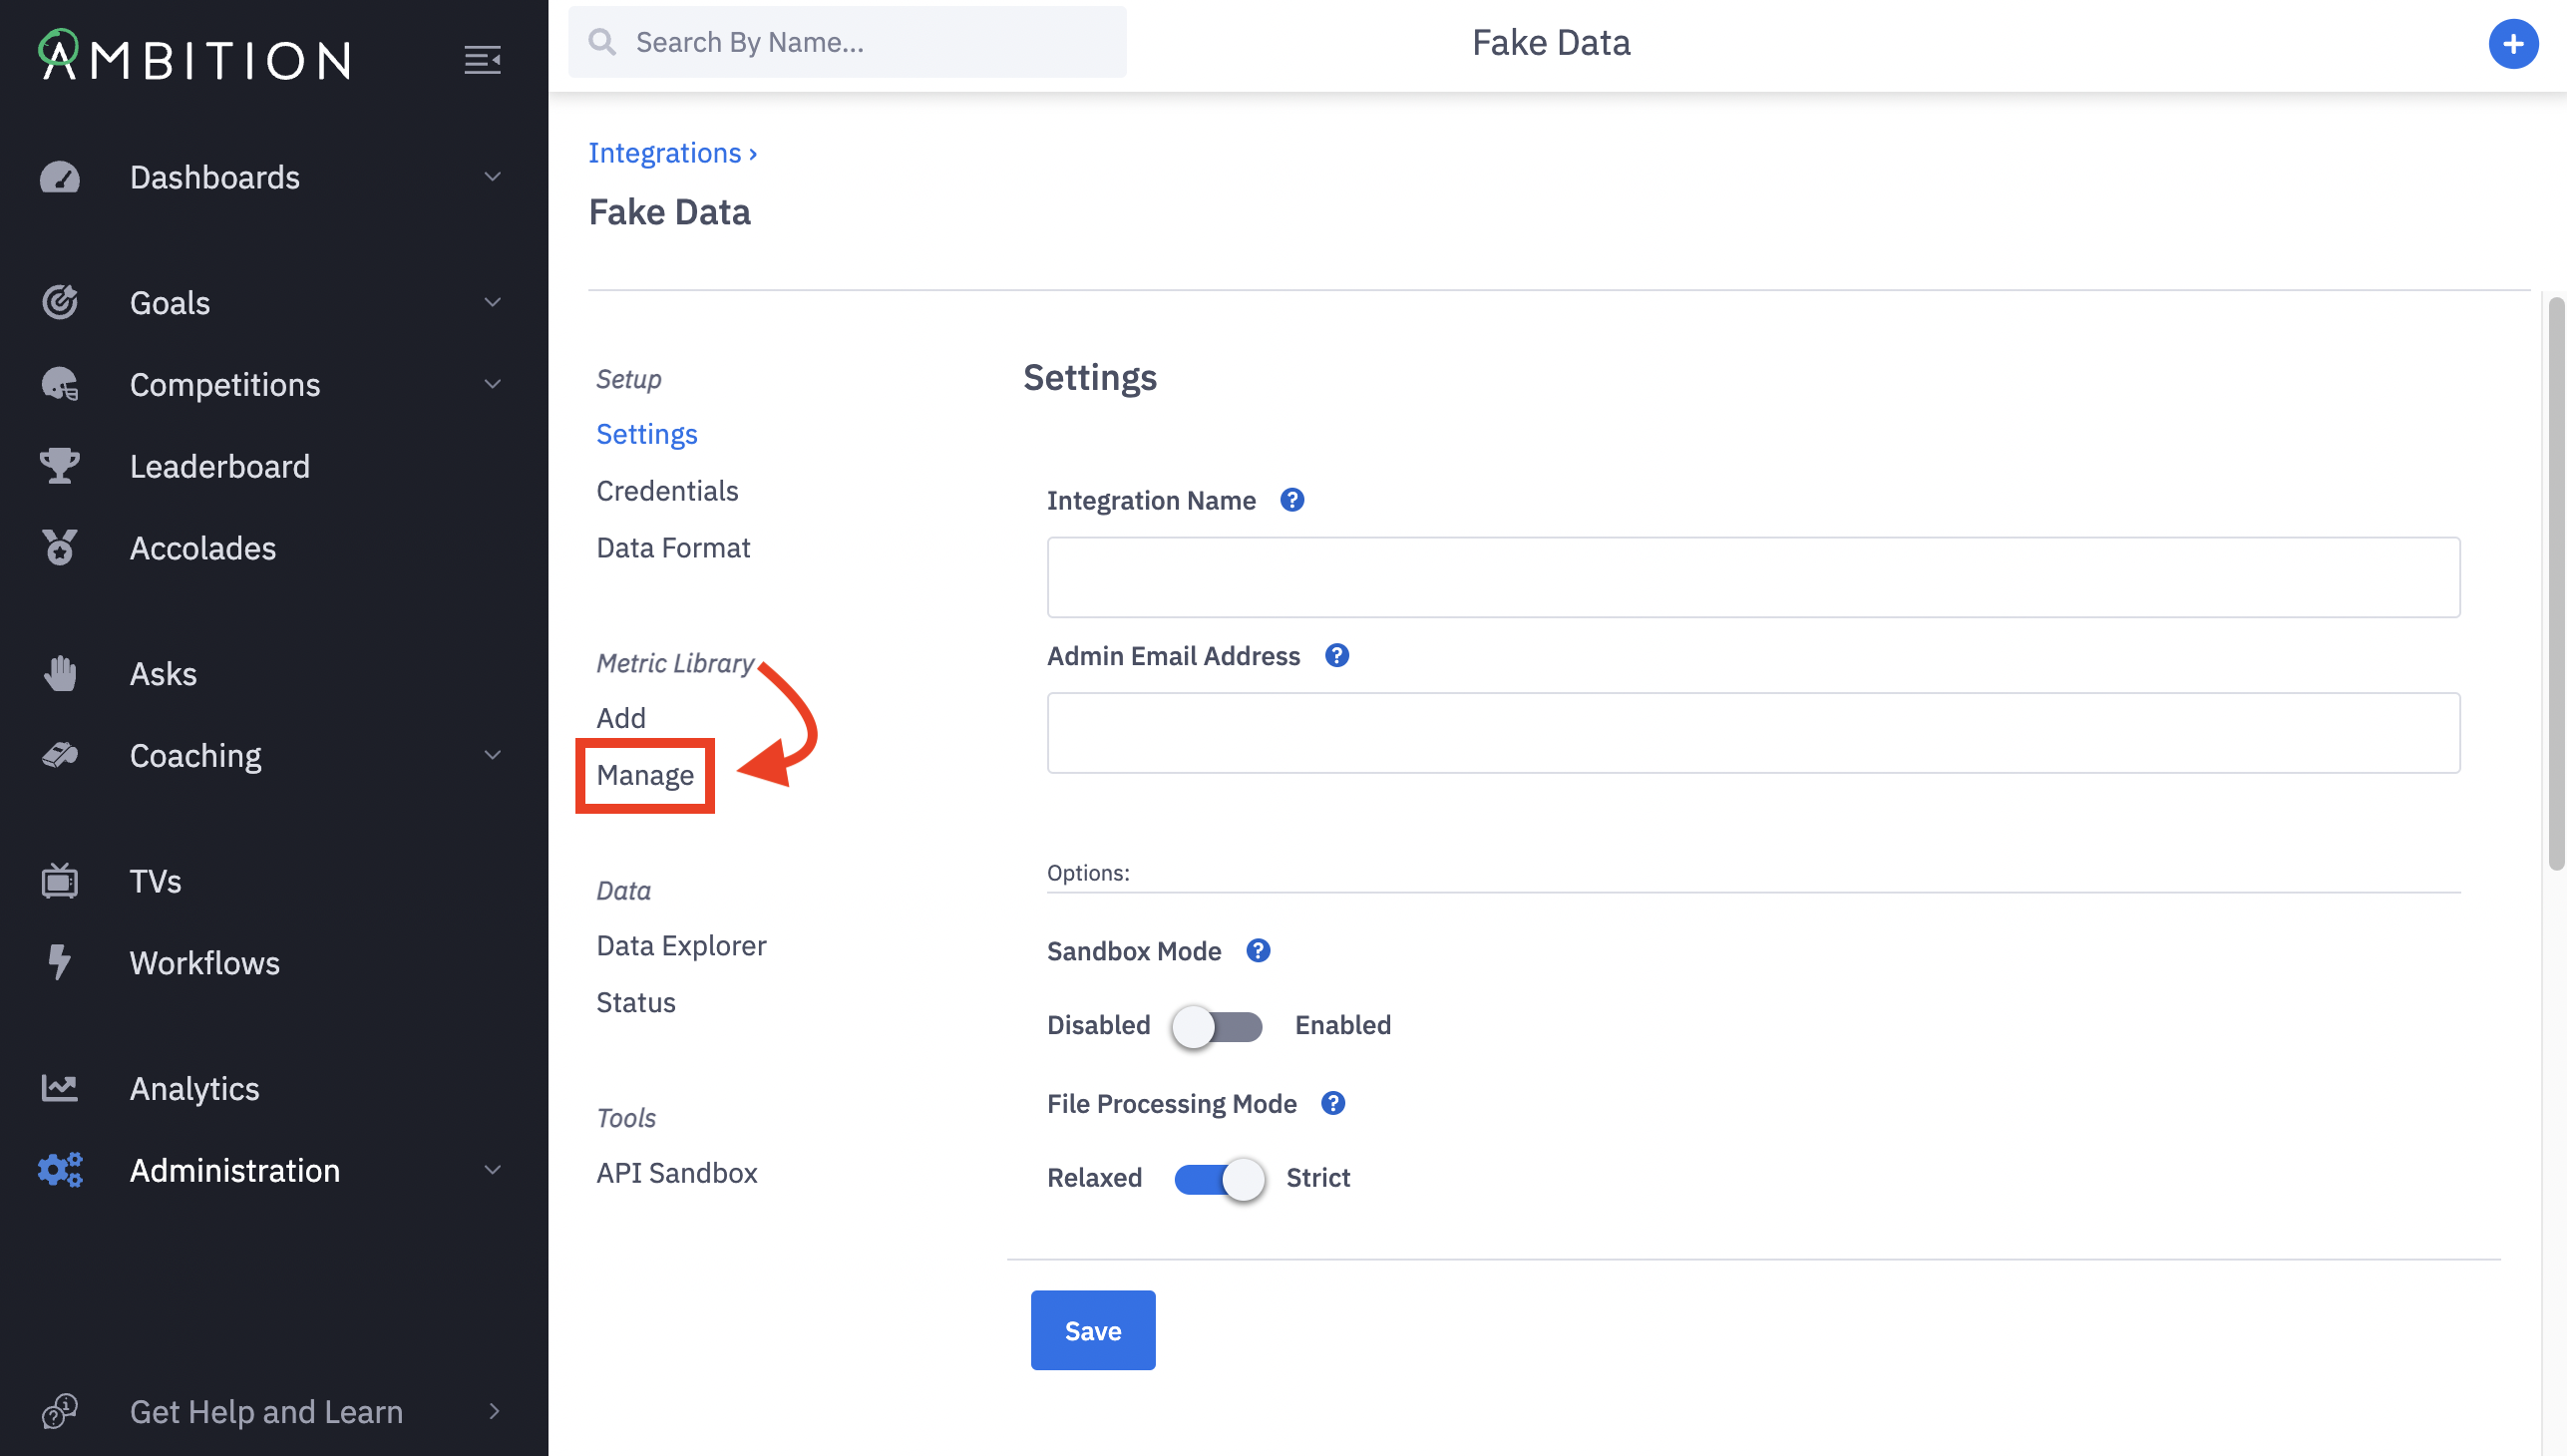
If you desire to build new metrics, click Add under the Metric Library tab.
Basics
Field | Field Description |
Name | Input the name of the metric. Visible to end users. 64 character limit |
Description | Optional. Input a description for this metric. Visible to end users. |
Source-of-Truth | Optional. Provide a URL to the dashboard/report that you're using to validate this metric. |
Computation
Field | Field Description |
Computation Type | Should the metric be counted, summed, or averaged? The count option applies only to the Records Data Format type. If the integration uses a Daily Totals Data Format, you will have the additional option of Most Recent Value. Learn more here. |
Value (field to sum/average) | If Sum or Average is selected, additionally select the field that contains the value to be summed or averaged. Note: Average computation type displays the averages over the days. (Sum of the Metric over a timeframe divided by # days in the timeframe) |
Who Gets Credit? | Select an available Email or Employee Unique Identifier field. |
When Do They Get Credit? | Select an available Date or Date/Time field. |
Display As | Is this metric a number, a financial amount, a percentage, or a duration? Note: To use the duration formatting for a metric like "Talk Time", the field being summed needs to be calculated in seconds. |
Metric Filters (typically only applicable for Records based Data Formats)
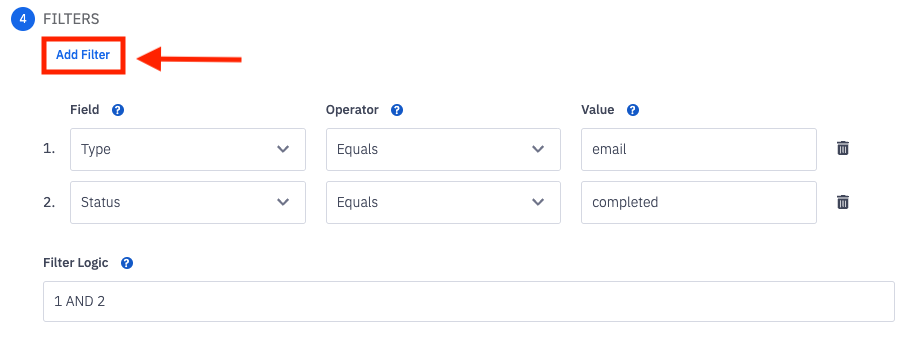
To add filters:
1. Click on the Add Filter button to optionally add logic.
2. Select a Field from the Field dropdown.
3. Select a logic statement from the Operator dropdown.
For more information about available Operators, click here.
4. Enter or select a value from the Value input/dropdown.
If you add multiple filters, a filter logic bar will appear where you can add logic to your filters as required.
For example, if you have Filter 1 and Filter 2 your Filter Logic bar can be:1 AND 2 which means both Filter 1 and Filter 2 must be True1 OR 2 which means either Filter 1 or Filter 2 must be True
Verify (optional)
To confirm that your metric configuration matches your expectations, you can use the verify tool. This is an optional tool that will validate the metric logic against the records within Ambition. The verify tool can be found when creating or editing any FTP metric.
1. When you are satisfied with your metric, select a User and Start and End Date to verify the metric accuracy.
Select "Exclude Filters in Query" if you'd like to view all records, including those that would fail the filter.
2. Click the Verify Configuration button.
3. Access the metric's accuracy and adjust filters as needed.
4. Click the Confirm and Save Changes button to save the metric.