How do I enable Salesforce Single Sign-On (Classic)?
Last updated: February 6, 2026
Salesforce Classic Single Sign-On (SSO)
Benefits of Single Sign-On
Enabling single sign-on with Ambition/Salesforce provides the following benefits:
Users can authenticate to Ambition with their Salesforce credentials.
If a user is already signed-in to Salesforce they will automatically be signed into Ambition.
Ambition access will automatically be revoked as employees leave your company (and are removed from your account management system).
Set Up Single Sign-On
In order to complete these steps, you must:
Be assigned Admin permissions in Ambition.
Have Salesforce create/edit privileges: Security Controls, Connected Apps, Permission Sets.
Salesforce Classic Identify Provider Setup
Configuring the Identity Provider (IdP)
1. Setup a domain using My Domain and deploy it to all users.
2. Click Setup, expand the Security Controls section, and click Identity Provider.
3. Click Enable Identity Provider
4. Locate SAML Metadata Discovery Endpoints and copy/paste the Salesforce Identity Metadata URL somewhere as you will need this later.
Configuring the Service Provider (SP)
1. Click Setup, expand the Create section, and click Apps.
2. Scroll to Connected Apps section and click New.
3. Complete the New Connected App form with the following information:
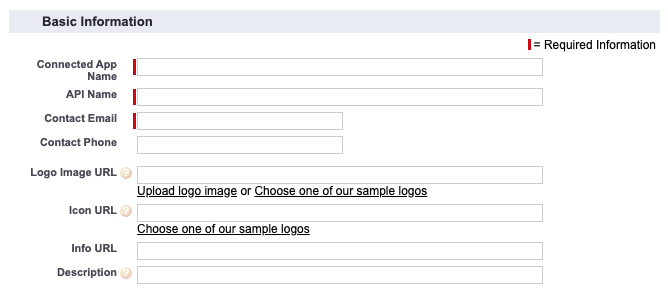
Basic Information (only need to complete required fields)
Connected App Name: Ambition SAML Authentication
API Name: Will be automatically generated
Contact Email: IT's email address

Web App Settings
Start URL: https://SUBDOMAIN.ambition.com/account-management/login/
Enable SAML: Check to enable
After checking Enable SAML, the form will expand. Continue completing the following fields:
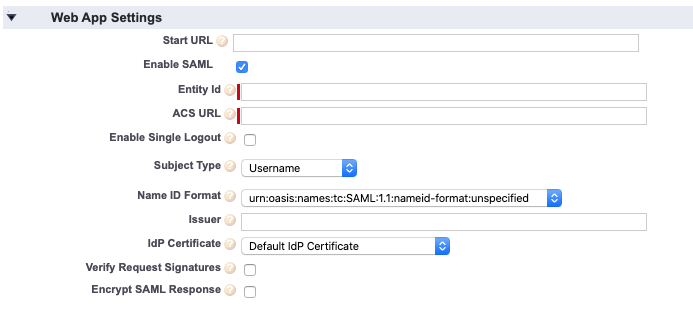
Entity Id: https://.ambition.com/account-management/login/
ACS URL: https://.ambition.com/account-management/login/
Name ID Format: urn:oasis:names:tc:SAML:1.1:nameid-format:emailAddress
Ensure that you replace SUBDOMAIN in the URLs above with your actual company named used when logging into Ambition.
4. Click Save on the New Connected Apps form.
5. After saving form, Click Setup, expand the Create section, and click Apps (again).
6. Scroll to Connected Apps and click on the name of the newly created Ambition SAML Authentication.
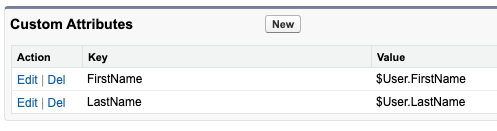
7. Scroll to Custom Attributes and click New.
You will add two attributes.
First Attribute:
Key: FirstName
Click Insert Field, select User > First Name, click Insert.
Click Save and then click New again.
Second Attribute:
Key: LastName
Click Insert Field, select User > Last Name, click Insert.
Click Save.
Permissions
1. Click Setup, expand the Manage Users section, and click Permission Sets.
2. Click New, complete the Permission Set form with the following required information:
Label: Ambition Single Sign-On
API Name: Will be automatically generated

3. Click Save on the Permission Set form.
4. Click on the name of the Permission Set you just created, Ambition Single Sign-On.
5. Click Assigned Connected Apps and click Edit.
6. Add Ambition SAML Authentication and click Save.
7. Click Manage Assignments, select desired users, click Add Assignments.
Enable Salesforce Classic Single Sign-On
1. Open the left navigation and click Administration > People > Single Sign-On.
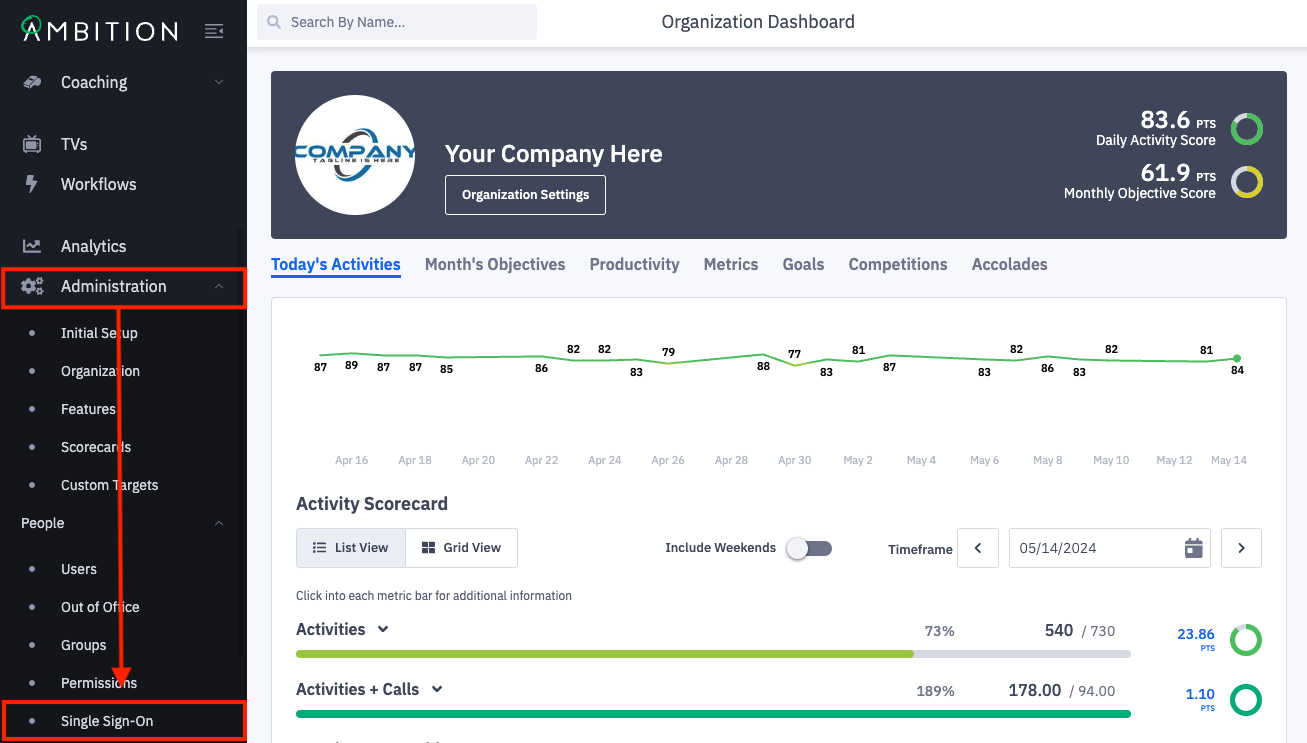
Don't see the Single Sign-On tab? The feature can be enabled by any user with system admin permissions. Enable Feature: Open the left navigation and click Administration > Features. Locate the SAML/SSO feature, and toggle "On". Click the Update Features button to save.
2. Click the Enable Single Sign-On button.

3. Complete the single sign-on setup form.
Integration Name: Defaults to SAML Authentication. Rename as desired.
IdP Metadata URL: The link copy/pasted from Salesforce.
First Name SAML Attribute:FirstName
Last Name SAML Attribute:LastName
Default User Time Zone: The corresponding default time zone your organization uses.
Just-In-Time Provisioning:
When toggled "On", Ambition will use a SAML assertion to create a user account the first time the user attempts to log in to Ambition.
When toggled "Off", you must manually create accounts for desired users, otherwise they will be denied Ambition access upon initial login. (default)
Expire Session at Browser Close:
When toggled "On", Ambition will always terminate a user's session when the browser is closed.
When toggled "Off", Ambition will preserve a user's session and prevent them from being logged out when the browser is closed.
4. Click the Save button.

Users can now log in to Ambition with Salesforce credentials.